
To ensure that emails delivered from CONREP to Microsoft 365 (formerly known as Office 365) are not incorrectly labelled as spam, it is a good idea to add the IP Addresses (from which your emails will be delivered) into your Microsoft 365 account.
This process is slightly different to other whitelisting, as Microsoft 365 limits the size of IP address ranges to a maximum of 256 IP addresses each (known as a /24). This article lists our IP addresses in ranges supported by Microsoft 365.
Note: if your account has one or more dedicated IP addresses, we strongly recommend that you only whitelist your account’s dedicated IP addresses.
The main benefit of whitelisting is that your email will automatically bypass unnecessary spam filters (as you have sent the emails).
To add CONREP IP addresses to the Microsoft 365 “IP Allow List”:
- In the Microsoft 365 Defender portal at https://security.microsoft.com, go to Email & Collaboration > Policies & Rules > Threat policies > Anti-spam in the Policies section. To go directly to the Anti-spam policies page, use https://security.microsoft.com/antispam
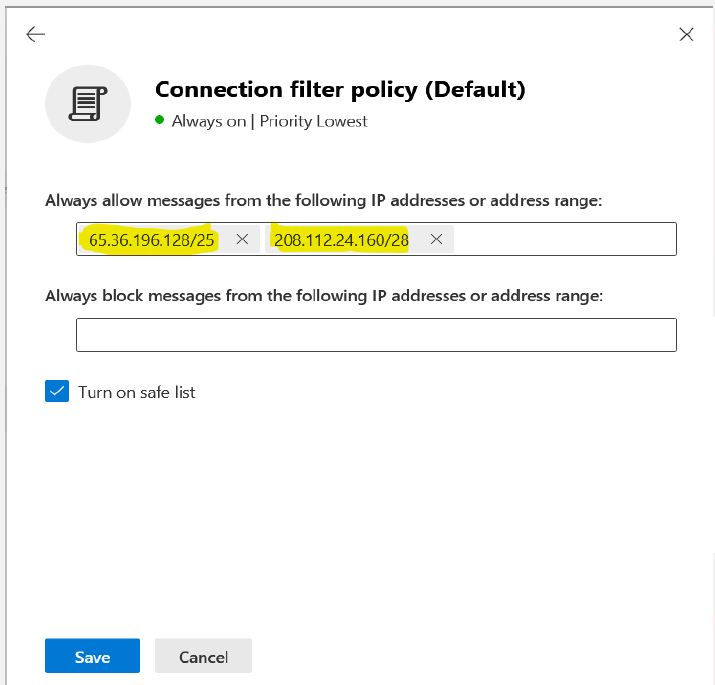
- On the Anti-spam policies page, select Connection filter policy (Default) from the list by clicking on the name of the policy.
- In the policy details flyout that appears, click Edit connection filter policy, then configure the following settings: Always allow messages from the following IP addresses or address range: This setting is the IP Allow list. Click in the box and enter each of our ranges of IP addresses mentioned below, one at a time. Enter a value, and then press Enter or select the complete value that’s displayed below the box.
- Turn on safe list: Enable the use of the safe list by selecting this check box.
- When you’re finished, click Save. Back on the policy details flyout, click Close
Whitelist our IP ranges
65.36.196.128/25
208.112.24.160/28
IP Ranges are listed below. Customers with dedicated IP addresses should whitelist only their account’s dedicated IP addresses.
65.36.196.128/25
208.112.24.160/28
Regards,
Conrep Team
How to add an SPF record:
1. Log in to Register Domain CPANEL
Navigate to godaddy.com, enter your credentials to log in to its dashboard.
2. Locate your domain
Under MENU “My Products”, find your domain you want to add the SPF record to, then click the DNS button, like this:
![]()
3. Create the record entry
Now you are on the DNS Management page, click the Add button in the Records section.
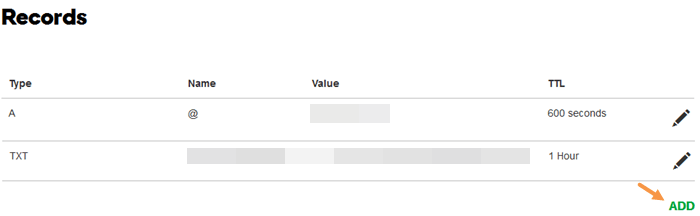
Now you will see a form where you can enter the settings for your SPF record, as shown below:

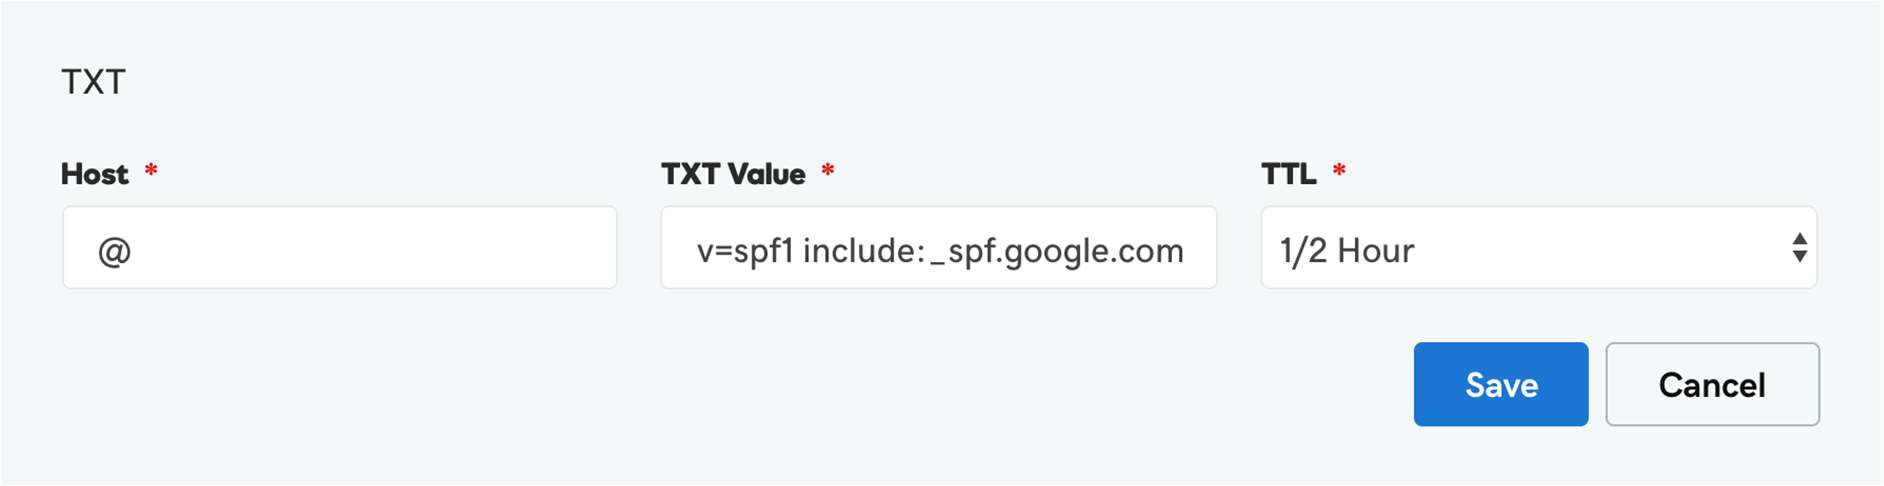
Make sure the record type is TXT, Host is set to @, and TXT Value is set to the SPF record generated above. Click the Save button. Now you have added the record!
How to add an DMARC record:
Again Click on Add to create a new record.
Note: If you already see a record with name ‘_dmarc’, edit this record instead of creating a new record! This is important as you can’t have multiple DMARC records
In the Type box select TXT. Enter _dmarc as the ‘host’. Enter your custom DMARC Analyzer TXT record in the TXT value box. You can find this record when you login to DMARC Analyzer and go to the DMARC Analyzer setup page.

You should now wait some time before the first reports will start to arrive in DMARC Analyzer. This is due to DNS caching and the fact that the ISPs mostly send one report each day. This can take upto 72 hours.